- "The human team has orders from Tiedemann to deliver the firing coordinates to the Solar Array."
- —Multiplayer objective.
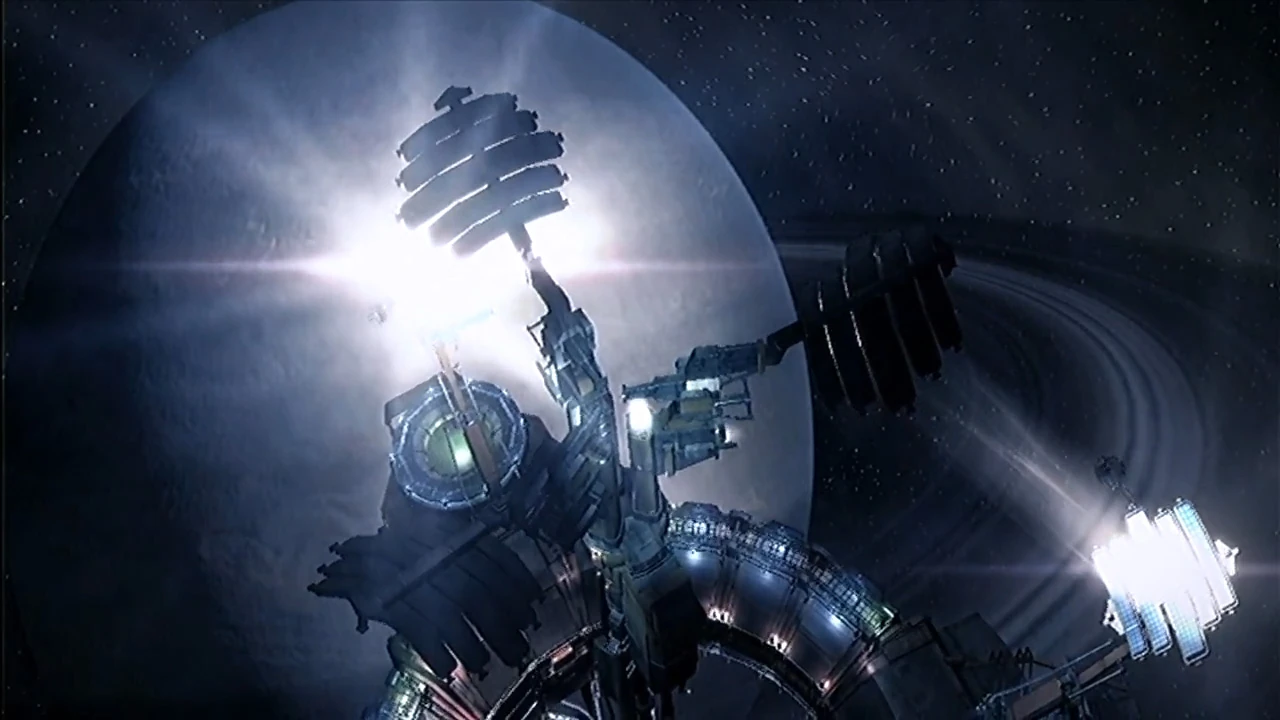
The Solar Array.
The Solar Array was what powered Titan Station until it was replaced by fusion reactors.[1] Isaac Clarke successfully reactivated the Array in Chapter 7. However, sometime in Chapter 9, Tiedemann's men delivered the firing coordinates to the Array, causing it to separate the Government Sector from the rest of the station.
Description[]
The Solar Array was composed of an outer rim, where dishes sent sunlight to the center column. The center column itself sent the energy to the station. It fell out of use and two of the three panels were misaligned. There were several oxygen refill stations situated around the array. When aligned, sunlight was reflected to the center column which winded up and sent the sunlight down to the generator which created power. A Necromorph Nest could also be found here.
Dead Space 2 Multiplayer[]
The Solar Array is where the Security Team were sent in by Director Tiedemann to deliver the firing coordinates to the Array. The team was attacked by the Necromorphs that were streaming up to the station.
Trivia[]
- The Solar Array beam was used to destroy the train tracks upon which Isaac Clarke and his allies were traveling upon in Chapter 9. This implies that canonically, the Security Team sent in successfully completed the mission, despite fierce resistance from the Necromorphs.
- When a multiplayer match begins you can hear them say, "One of Tiedemann's patients has sabotaged the Solar Array." This is a lie, as Isaac actually fixed the Array.
- It is possible that the sabotage they are referring to is Isaac destroying the ANTI computer mainframe.
- If the humans win a round on this map one of them may say, "So much for Tiedemann's patient," or "The Array is firing. He can't survive that,"[2] reinforcing that this map is set during Chapter 9.
- You can see the USG Ishimura from the Array during Chapter 7.
Gallery[]
")
Sources[]
| |||||